Outlook Tip: How to Use Email Rules to Automatically Move Incoming Emails into Folders

![]()
In this post, we’ll take a look at how you can manage your email better by having incoming mail automatically moved into separate folders. If you get a lot of email each day, this can save a lot of time rather than having to spend an hour once a week moving emails from the Inbox to your categorized folders. Email rules may seem complicated, and it can be if you want to do some very sophisticated things, but if you simply want to move John’s emails to the John folder automatically, then it’s a piece of cake.
In order for rules to be useful, you should create some folders underneath your Inbox to categorize your email, for example Projects, Work, Family, Wife. You can create folders by right clicking on the main folder and selecting New Folder.
Now to get started, open Outlook and go to Tools and then Rules and Alerts.

The Rules and Alerts main window will appear and from here you will click the New Rule button to get started with your first Outlook email rule.
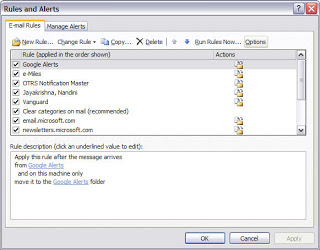
Once you click New Rule, you’ll get the familiar Windows wizard to help you through the process. You’ll see two radio buttons at the top one for creating a new rule and one for using the wizard; stick with the default wizard for now.
In the list box below the radio buttons, you’ll see a few rule templates that you can use to get started. These are the most common and probably all you’ll ever need. The most common rule is the first one listed, “Move messages from someone to a folder“. Go ahead and select it if it’s not already selected.
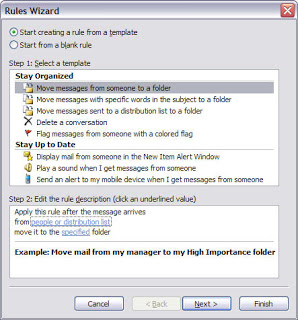
The bottom list box contains the actions for the rule. All of you have to do to setup the rule is click on the hyperlinks for which email address and where you want it to go. Click “people or distribution list” and select the email address from your contact list. If the person is not in your contact list, you can type the email address into the text box.
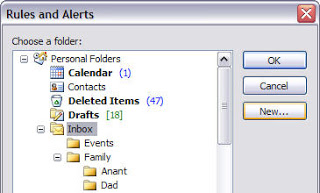
Then click on the word specified and browse to the folder you would like the email to be moved to, or click New and a new folder will be created under the currently highlighted folder.
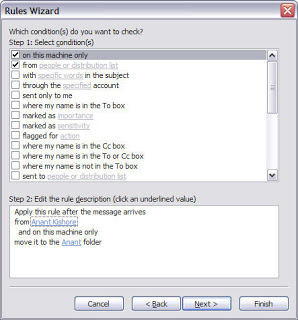
When you click OK and then Next, you can set conditions for your rules. These can usually be left at their default values, but if you want to get specific – such as emails from John marked as Important, or with specific words in the email, you can read through the conditions.
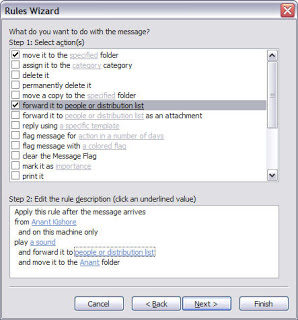
Click Next and you’ll get to the screen to decide what you want to do with the message. Outlook automatically checks the first box with the name of the folder you wanted to move the emails to.
You can also select many other options along with moving the email such as deleting it, putting it into a category (which you can later use to search for emails), copy it to another folder (if you want the email stored in two places), forward it to someone (if you have project emails and want to update all the team members automatically if you get an email from a client for example), print the email, display an alert on your desktop, and even play some music if you want, just like a ring tone!
Once you check any of the boxes, you can edit the values in the bottom list box by clicking on the blue highlighted link.
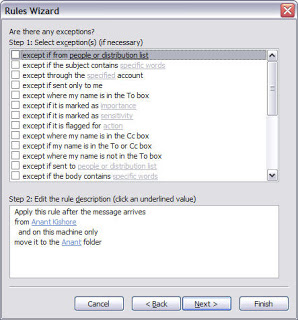
Click Next when you are done and you’ll be brought to the Exceptions dialogue, where you can choose the conditions when you would not want to have this rule processed. Unless you have some unique case, you can leave the default which is blank.
Click Next and you’ve finally reached the end of the rule wizard! Give the rule a name like “Email from John” so that you know what it does. Then, if you have emails in your Inbox that would match your rule, check the box to “Run this rule on messages already in Inbox“. You can leave everything else as default and click Finish!
Now you can create rules for all the other people who email you regularly and start managing your email more effectively!
We hope that this information is useful. For more information on our IT Support services for business, please take a look at https://cfsystems.co.uk/it-support/